Rotary Union Leak Fluid

Why Does Rotary Union Leak Fluid When the Equipment Starts Rotating? – Not Leak When Stationary

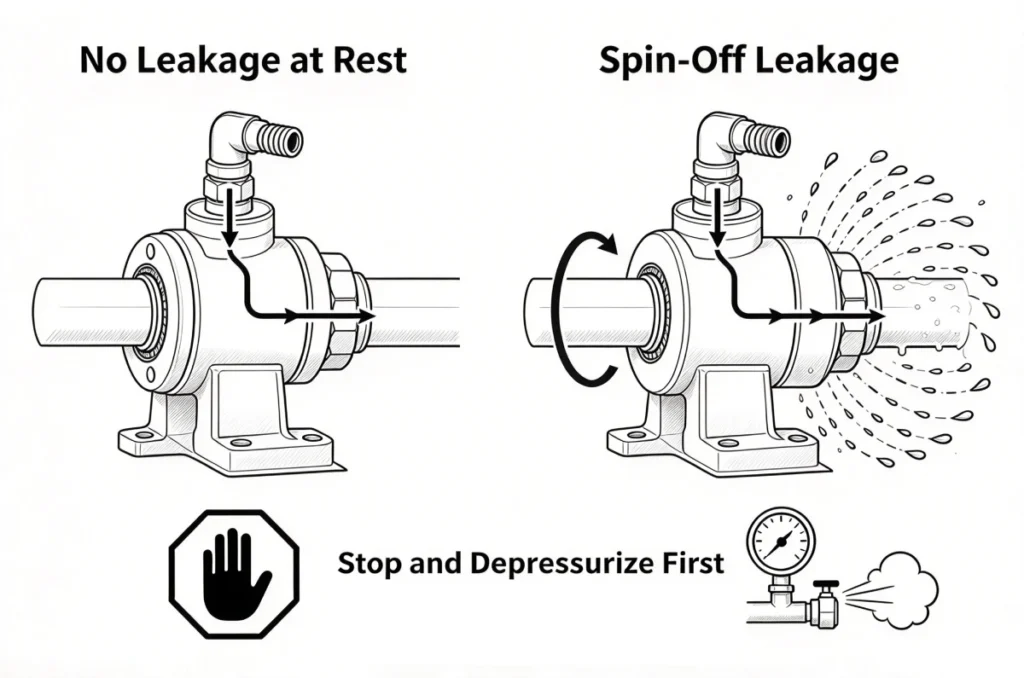
The area around the rotary union remained completely dry, when the equipment was shut down and held under pressure for ten minutes. Just as the spindle began to pick up speed, droplets of water were flung outward along the casing, forming a ring.

The immediate reaction on site is often: the seal must have failed. But even after dismantling the rotary joint, replacing the seal, and restarting the equipment, the leakage soon returns.

The reason is simple: a static test only confirms that the rotary union can seal while stationary. Once rotation begins, other factors, such as concentricity, hose stress, sealing surface condition and drainage start to work affect performance.

1. Static Seals and Dynamic Seals Are Not the Same

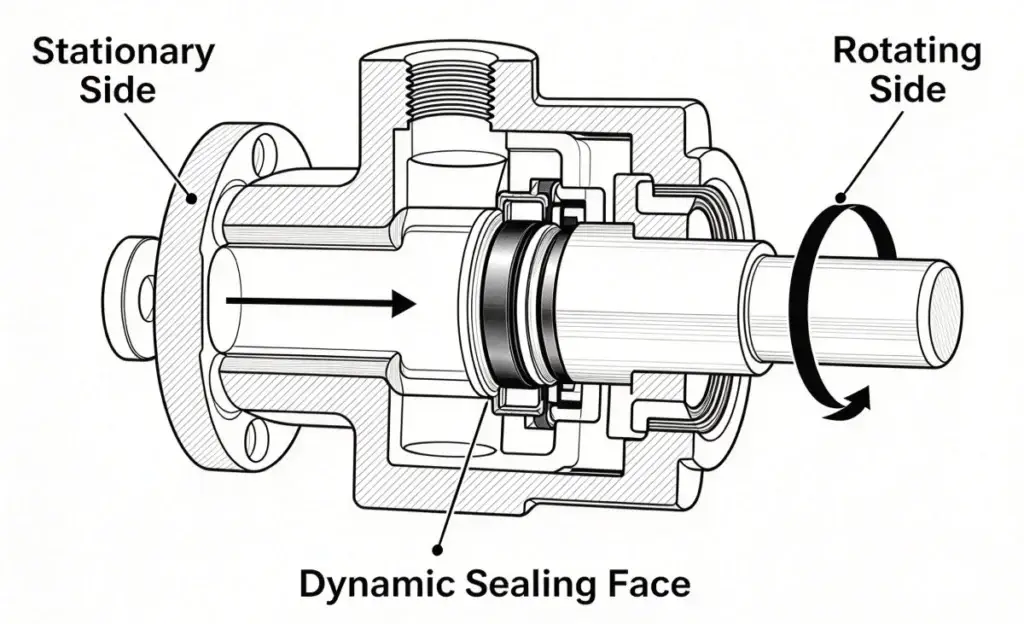
A rotary union transfers fluid such as water, oil, or compressed air from stationary piping into a rotating shaft.

During operation, the rotor turns with the shaft while the housing remains stationary. The internal sealing surfaces must therefore maintain contact while allowing relative sliding between the components.

When the equipment is stopped, slight eccentricity may be absorbed by the elasticity of the seal. Once rotation starts, however, that same eccentricity becomes periodic movement. The sealing surfaces can repeatedly open and close, creating small gaps through which the medium is expelled.

This is why a rotary union can appear completely leak-free during a pressure test and still leak as soon as the shaft rotates.

Internal structure of rotary union
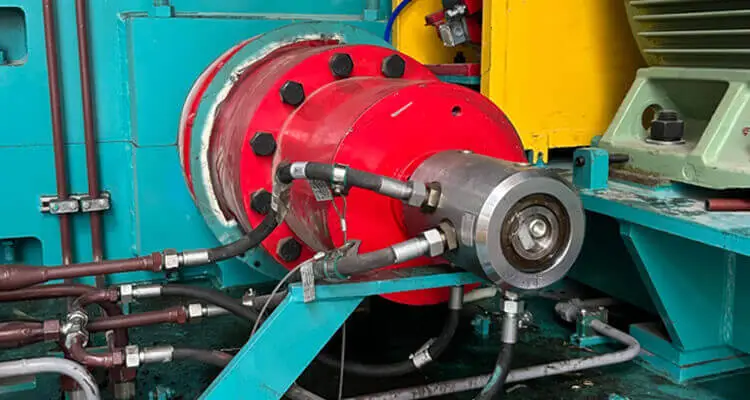
Metallurgy rotary joint

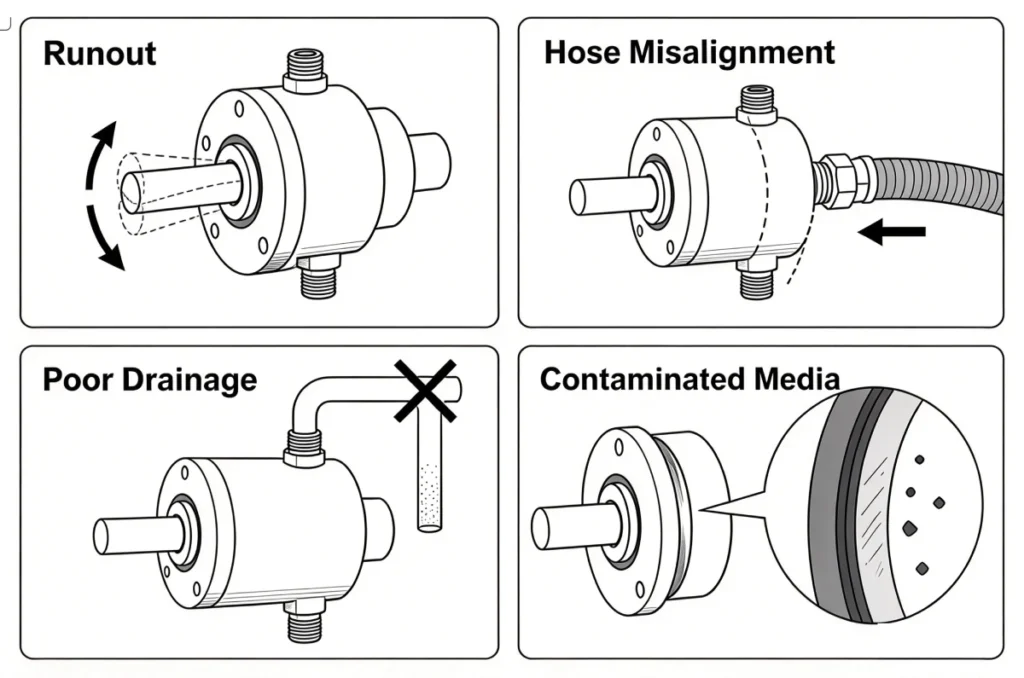
2. Four Common Root Causes of Rotary Union Leakage

2.1 Inaccurate installation datum

Burrs or nicks on the shaft-end locating surface, poor concentricity between the mounting hole and shaft axis, excessive thread runout, or an uneven flange face can cause the rotary joint to wobble during operation.

The problem may not be obvious when the machine is stopped. During rotation, however, the misalignment becomes dynamic movement and can destabilize the sealing surfaces.

Rotary union manufacturers normally specify interface and installation tolerances for precisely this reason. Excessive deviation can lead to leakage, vibration, and unstable operation.

2.2 The Hose Is Pulling the Rotary Union Out of Alignment

A hose that is too short, bent beyond its recommended radius, or replaced with a rigid pipe connection may look acceptable when the system is not running.

Once pressurized, however, the hose can stiffen and apply continuous lateral force to the housing. That additional load can be transferred to the bearings and sealing surfaces.

In other words, the rotary union itself may not be the original source of the problem. The connected piping can be creating the conditions that cause it to fail.

2.3 Contamination or Dry Friction

Metal shavings, sealant fragments, rust particles, or other contaminants entering the sealing interface can create leakage paths.

Dry running is another common problem. In rotary union designs that depend on the operating medium for lubrication, running without sufficient fluid can cause rapid heat buildup and damage the sealing surfaces.

A contaminated system or insufficient lubrication can therefore shorten the service life of an otherwise suitable rotary joint.

2.4 Incorrect Operating Conditions or Drainage

A rotary union must match the actual operating conditions, including pressure, rotational speed, temperature, and medium.

Even when the model itself is suitable, poor drainage can create another problem. An upward-facing leakage port, elevated return line, or backpressure can prevent fluid from leaving the housing properly. Instead, the fluid accumulates internally and is eventually thrown outward by the rotating components.

In these cases, what appears to be a seal failure may actually be a drainage problem.

Causes of rotary union failure

3. Determine Exactly Where the Fluid Is Coming From

Do not dismantle the rotary union simply because you see a ring of fluid around the housing.

First shut down the machine, relieve the pressure, and make sure the temperature is safe. Clean the exterior, then observe the assembly again while jogging the equipment at low speed.

The actual leak location provides more useful diagnostic information than the direction in which the fluid is sprayed.

  • If the fluid comes from a pipe thread or hose fitting, check the connection seal first.
  • If it comes from the housing leakage port, investigate internal seal wear and possible blockage in the drainage path.
  • If the housing visibly wobbles during rotation, check installation runout and the lateral forces being applied by the hose.

This simple distinction can prevent unnecessary disassembly and replacement of otherwise serviceable components.
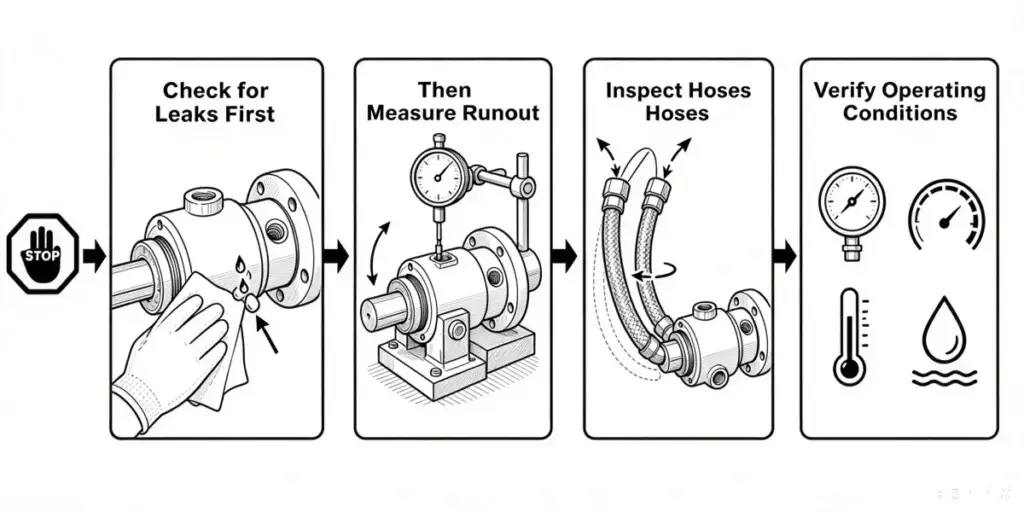
Rotary union inspection steps

4. On-Site Rotary Union Inspection Procedure

A practical troubleshooting sequence is:

First, verify the application.
Confirm that the rotary union model is suitable for the actual medium, pressure, temperature, and rotational speed.

Next, inspect the mechanical installation.
Check the shaft-end locating surface, register fit, flange, and fasteners for damage, contamination, or improper installation.

Then, measure runout.
After installation, use a dial indicator to measure radial and axial runout and compare the results with the tolerances specified in the technical documentation.

Check the hose connection.
Make sure the flexible connection is not under tension, compression, or twisting. The hose should not continuously load the rotary union laterally.

Inspect the drainage path.
The leakage line should drain continuously downward from its lowest point and should not be subject to unnecessary backpressure.

Finally, check the medium and filtration.
Inspect filters and verify that the operating medium is free from particles or contamination that could damage the sealing interface.

If leakage from the vent or leakage port continues after correcting the installation and piping, do not simply plug the opening, increase the preload, or keep running the machine at high speed to “break in” the seal.

Those actions can turn a controlled leakage problem into bearing contamination or further sealing-surface damage.

The safer approach is to stop the equipment and repair or replace the rotary union while also addressing upstream causes such as contamination, misalignment, or off-center loading. Otherwise, the replacement unit may fail in exactly the same way.
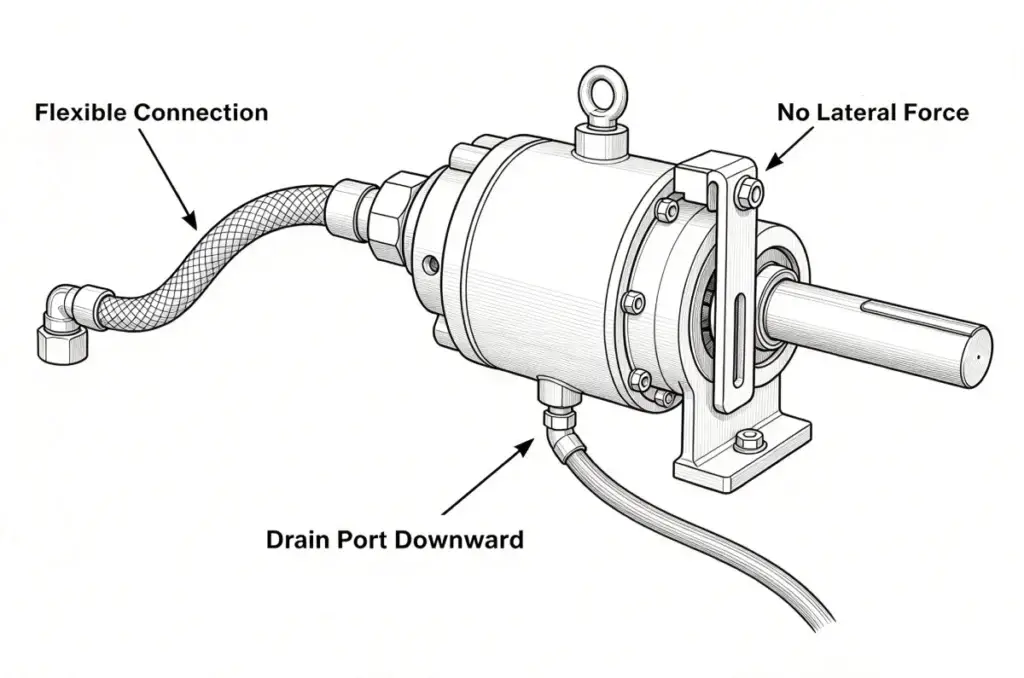
flexible connection for rotary union

5. A Crucial Diagnostic Insight

When a rotary union does not leak while stationary but starts leaking during rotation, the root cause is not necessarily seal aging.

Rotation exposes problems that may remain invisible during a static inspection: shaft runout, lateral loading, friction, vibration, and poor drainage.

A more efficient troubleshooting sequence is therefore:

Locate the leak → measure runout → check hose loading and operating conditions → inspect the internal seals.

In many cases, this approach is faster and involves less rework than immediately replacing the sealing components.

Conclusion

A rotary union that remains completely dry during a static pressure test can still develop obvious leakage once the equipment starts rotating. In many cases, the seal is not the only factor involved. Shaft runout, installation accuracy, hose loading, contamination, operating conditions, and drainage can all affect sealing performance under dynamic conditions.

When troubleshooting rotary union leakage, it is better to identify the actual leak source and check the installation and operating conditions before replacing internal seals. A systematic inspection can not only solve the immediate leakage problem but also prevent the replacement rotary joint from failing for the same underlying reason.

Understanding how a rotary union behaves (complete guide) under real rotating conditions is essential for reliable fluid transfer and longer service life.

Scroll to Top